The Field Settings page contains general template information. In the Field Settings page, the user can customize the Threat Fields, Opportunity Fields, Mitigation Plan Fields, Mitigation Step Fields, Closure Section Fields, Qualitative score fields, Simulation Fields, Data Mapping Fields, Risk Notes Fields and Recovery Plan Fields. The Field Settings page in the PRC Enterprise Risk Register can be viewed only by those users who have either Read/Write or View access. Users with only Read/Write access can create a new template, edit template information and show/hide fields. Users designated with View Access may view the selected template.
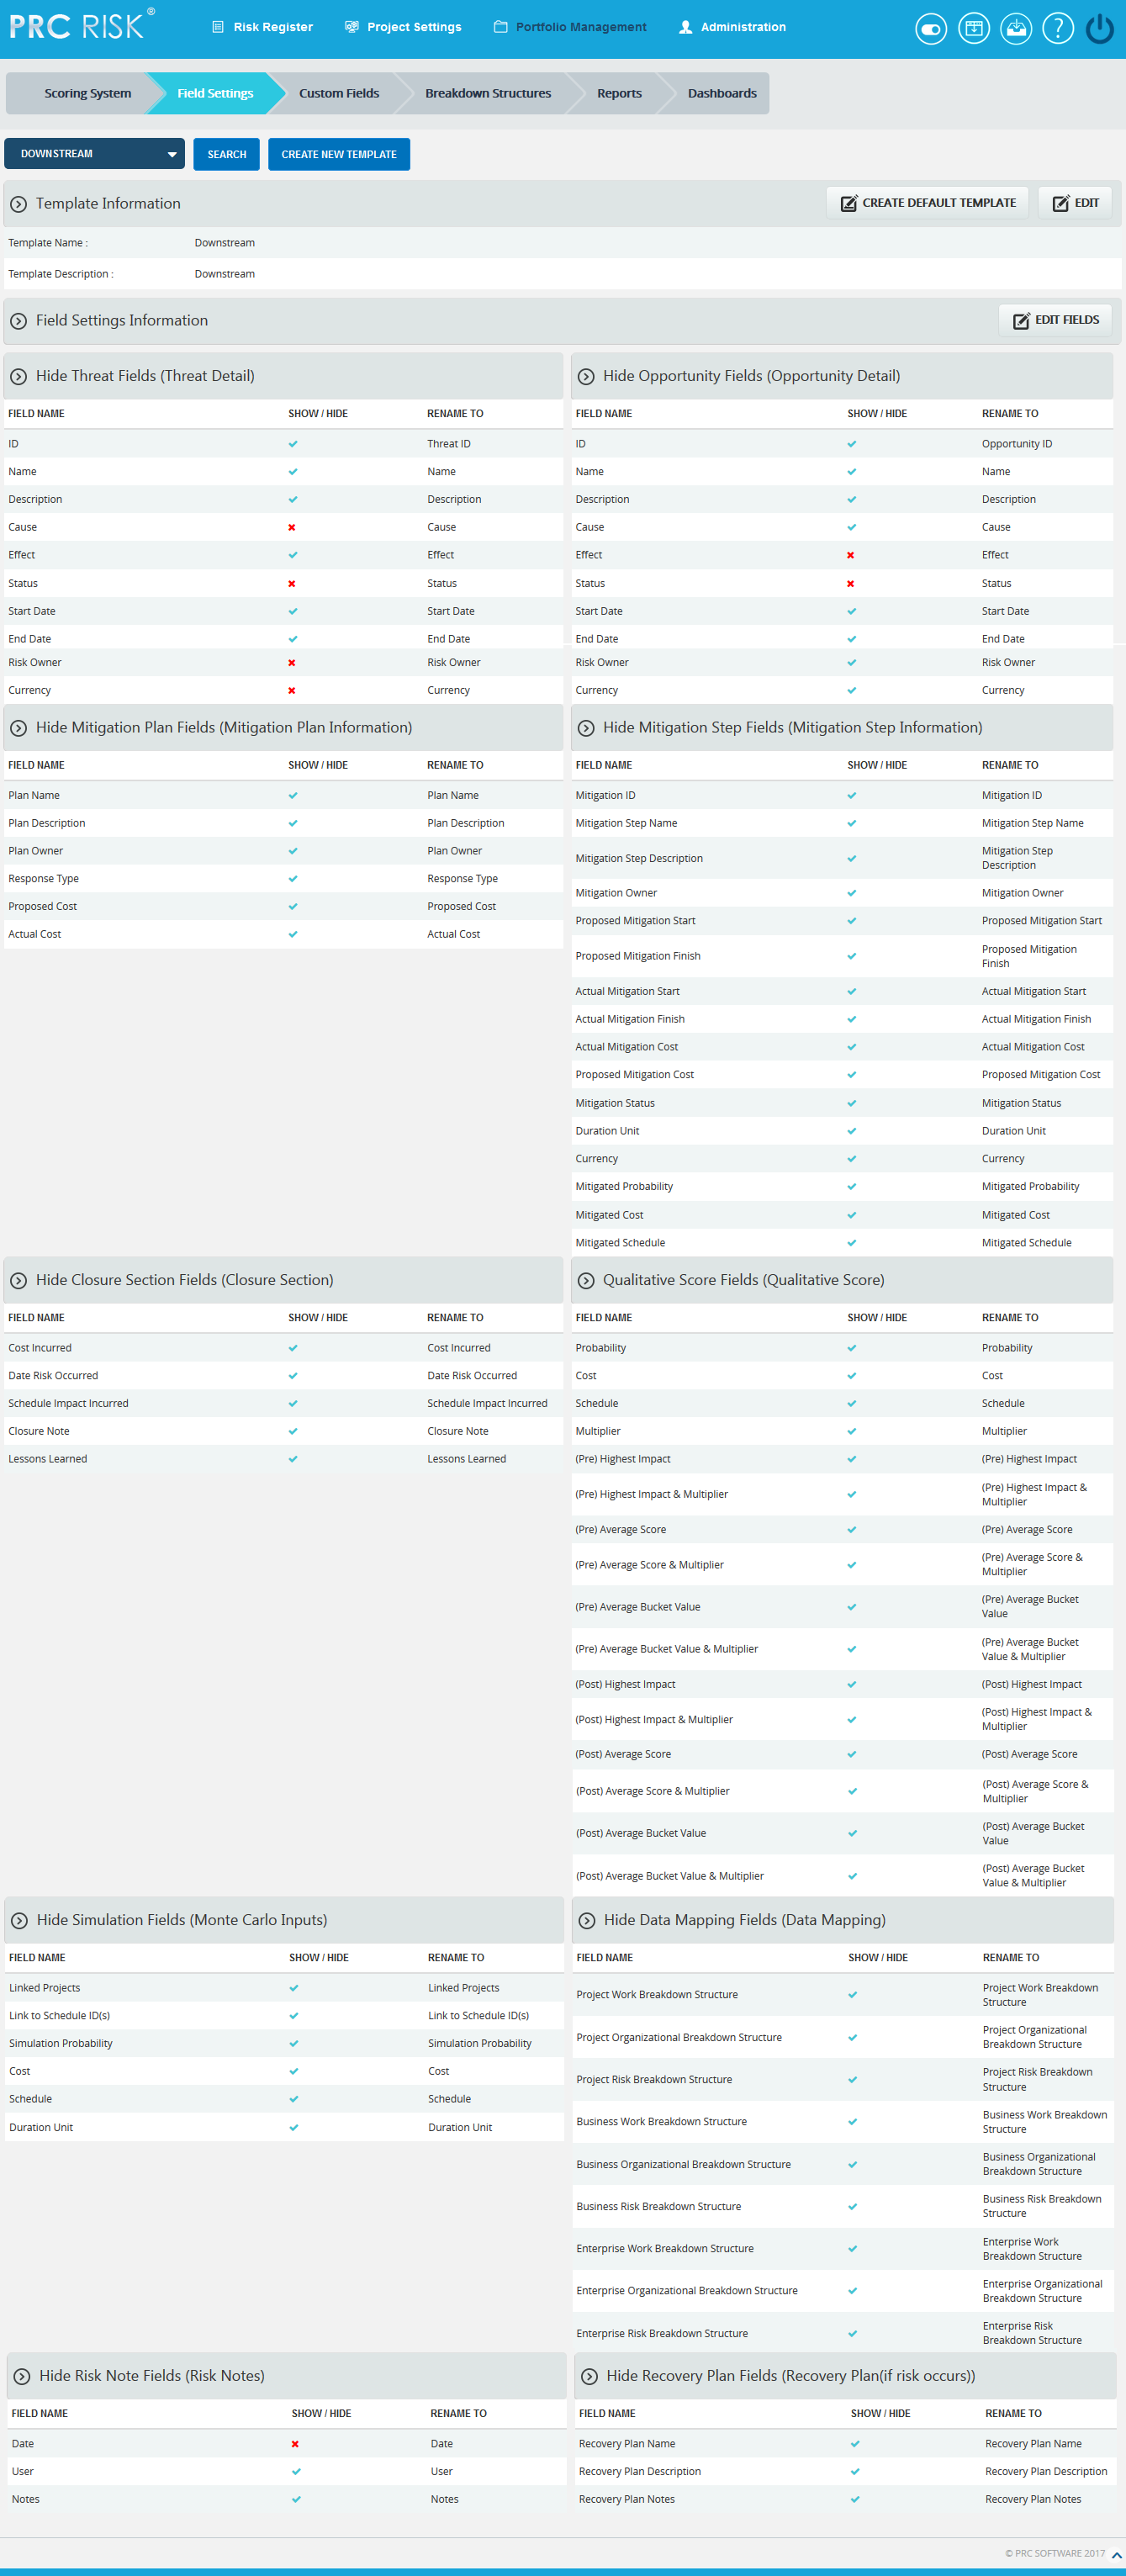
Figure 1
Searching For Templates:
Searching for templates in the Field Settings page can be done in two ways. The Search function allows the user to search for a template based on a keyword. This method is faster when you are working with large amounts of data. The Select function is commonly used for databases with less data and when the search objective is known.
Using the search function:
Steps:
-
Portfolio Management —> Field Settings
-
Click the SEARCH button. (Figure 1)
-
Enter the search keyword (which can be the Template Name or Template Description). Click the SEARCH button and select the required template. (Figure 2)
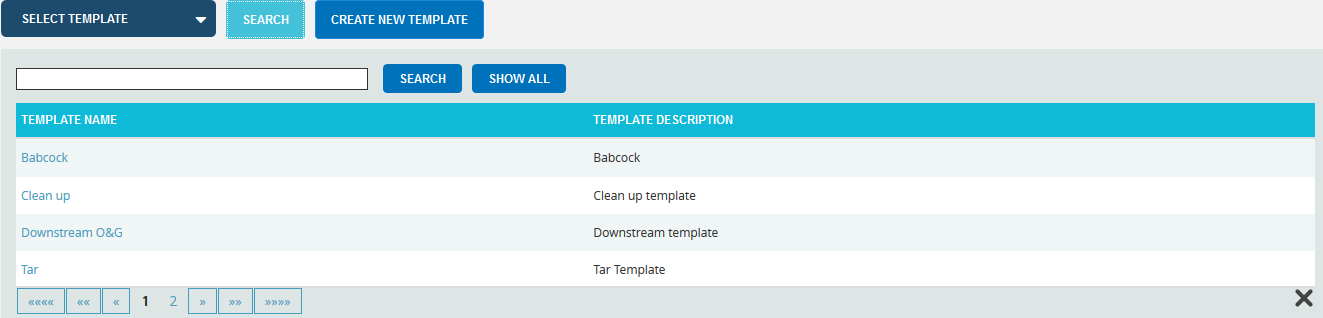
Figure 2
The SHOW ALL button in the search area lists all the templates available (By default).
Using the select function (dropdown list):
Steps:
- Portfolio Management —> Field Settings
- Click the Select Template dropdown. (Figure 1)
- Select the required template from the list shown.
Creating a new template:
Creating a new template is quick and easy. The Template Name is a required field to save the template.
Steps:
- Portfolio Management —> Field Settings
- Click the CREATE NEW TEMPLATE button. (Figure 1)
- After entering template details, click the SAVE button.
Creating default template:
This functionality is used to create a Master Template. Only once the default template can be created and is done by Super User.
Steps:
- Portfolio Management —> Field Settings
- Click the CREATE DEFAULT TEMPLATE button. (Figure 1) or (Figure 2)
- After entering template details, click the SAVE button.
View Default Template:
To view the default template (Master Template), click the VIEW DEFAULT TEMPLATE button. (Figure 1)
Edit Template Information:
While editing the template details, the fields Template Name and Template Description will be unlocked.
Steps:
- Portfolio Management —> Field Settings
- Select the required template.
- Click the EDIT button. (Figure 1)
- After the data is modified, click the SAVE button.
Edit Fields:
This functionality is used to modify the name of each section and fields of the template.
Steps:
- Portfolio Management —> Field Settings
- Click EDIT FIELDS button to modify. (Figure 1)
- Enter the name in the textbox provided, shown at the top of the section (the default name is given) and rename the fields. (Figure 3)
- After editing the changes, click the SAVE ALL button to save the changes. (Figure 3)
Show/ Hide:
Show/Hide applies to each section. As an example, Figure 3 shows the Closure section with the Hide Closure Section Fields in the upper left corner. However, the steps described below apply to all sections.
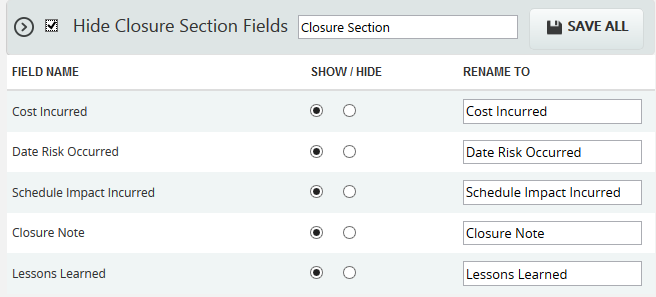
Figure 3
In order to hide the entire section, click the checkbox shown near the section header and click the SAVE ALL button to save the changes. (Figure 3)
To show a field, click the Radio button under the Show column (Figure 3) and click the SAVE ALL button to save the changes.
To hide a field, click the Radio button under the Hide column (Figure 3) and click the SAVE ALL button to save the changes.
Edit Status Options (Threat/ Opportunity):
To add, edit or delete the user editable status options. These statuses are categorized into two: open and closed. The statuses checked in SHOW checkbox is only shown in the status list for the mitigations in the Risk Details or Spreadsheet page.
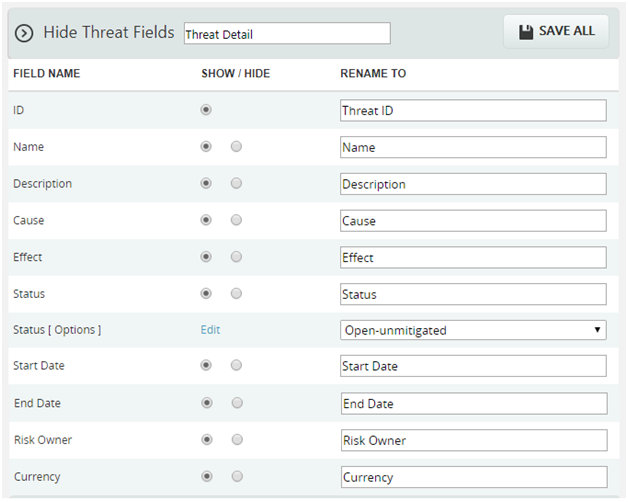
Figure 4
Steps:
- Click the Edit (Figure 4)
- A pop up appears where the user can add or edit the status options. (Figure 5)
- Click the ADD button to add a new status option. (Figure 5)
- Click the EDIT button to edit the saved status options. (Figure 5)
- To delete the status, click the DELETE (Figure 6)
- Click the SAVE button to save the changes made. (Figure 6)
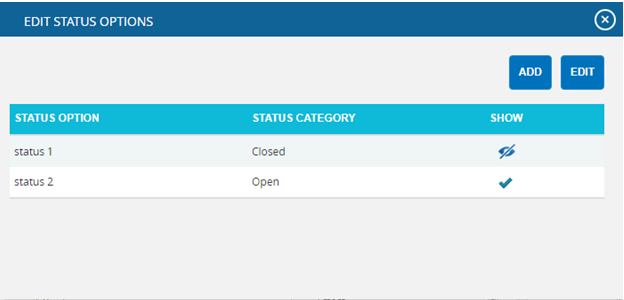
Figure 5
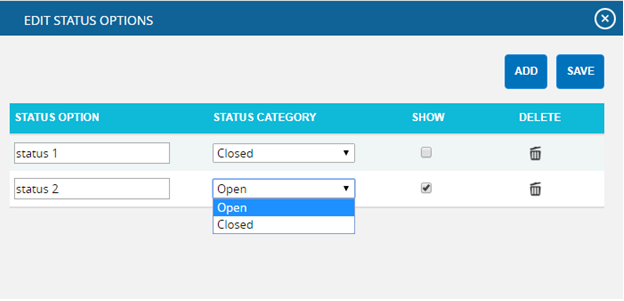
Figure 6
Edit Status Options (Mitigation):
To add, edit or delete the user defined mitigation status options. These statuses are categorized into Proposed, In Progress, Rejected, Complete, Risk Closed and Approved. The statuses checked in SHOW checkbox is only shown in the status list for the mitigations in the Risk Details or Spreadsheet page.
Steps:
- Click the Edit (Figure 7)
- A pop up appears where the user can add or edit the mitigation status options. (Figure 8)
- Click the ADD button to add new mitigation status option. (Figure 8)
- Click the EDIT button to edit the saved mitigation status options. (Figure 8)
- To delete the mitigation status, click DELETE (Figure 9)
- Click the SAVE button to save the changes made. (Figure 9)
![]()
Figure 7
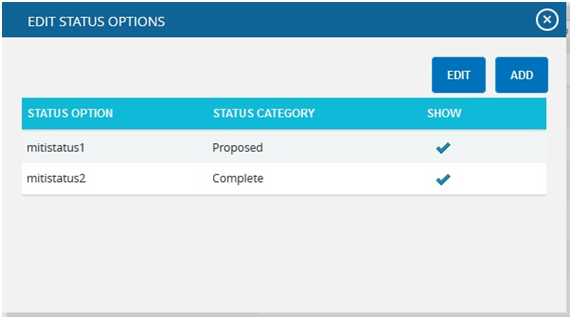
Figure 8
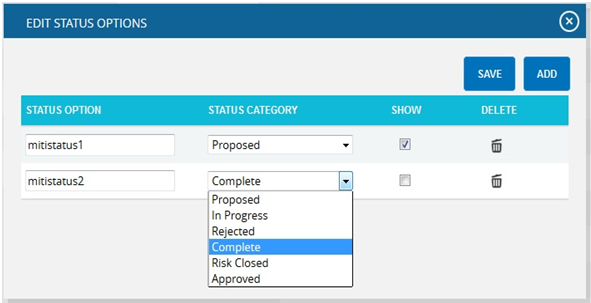
Figure 9