The Import Mitigations page allows the user to import mitigations. This functionality is important when you need to download a large amount of data from an existing file to the Risk Register.
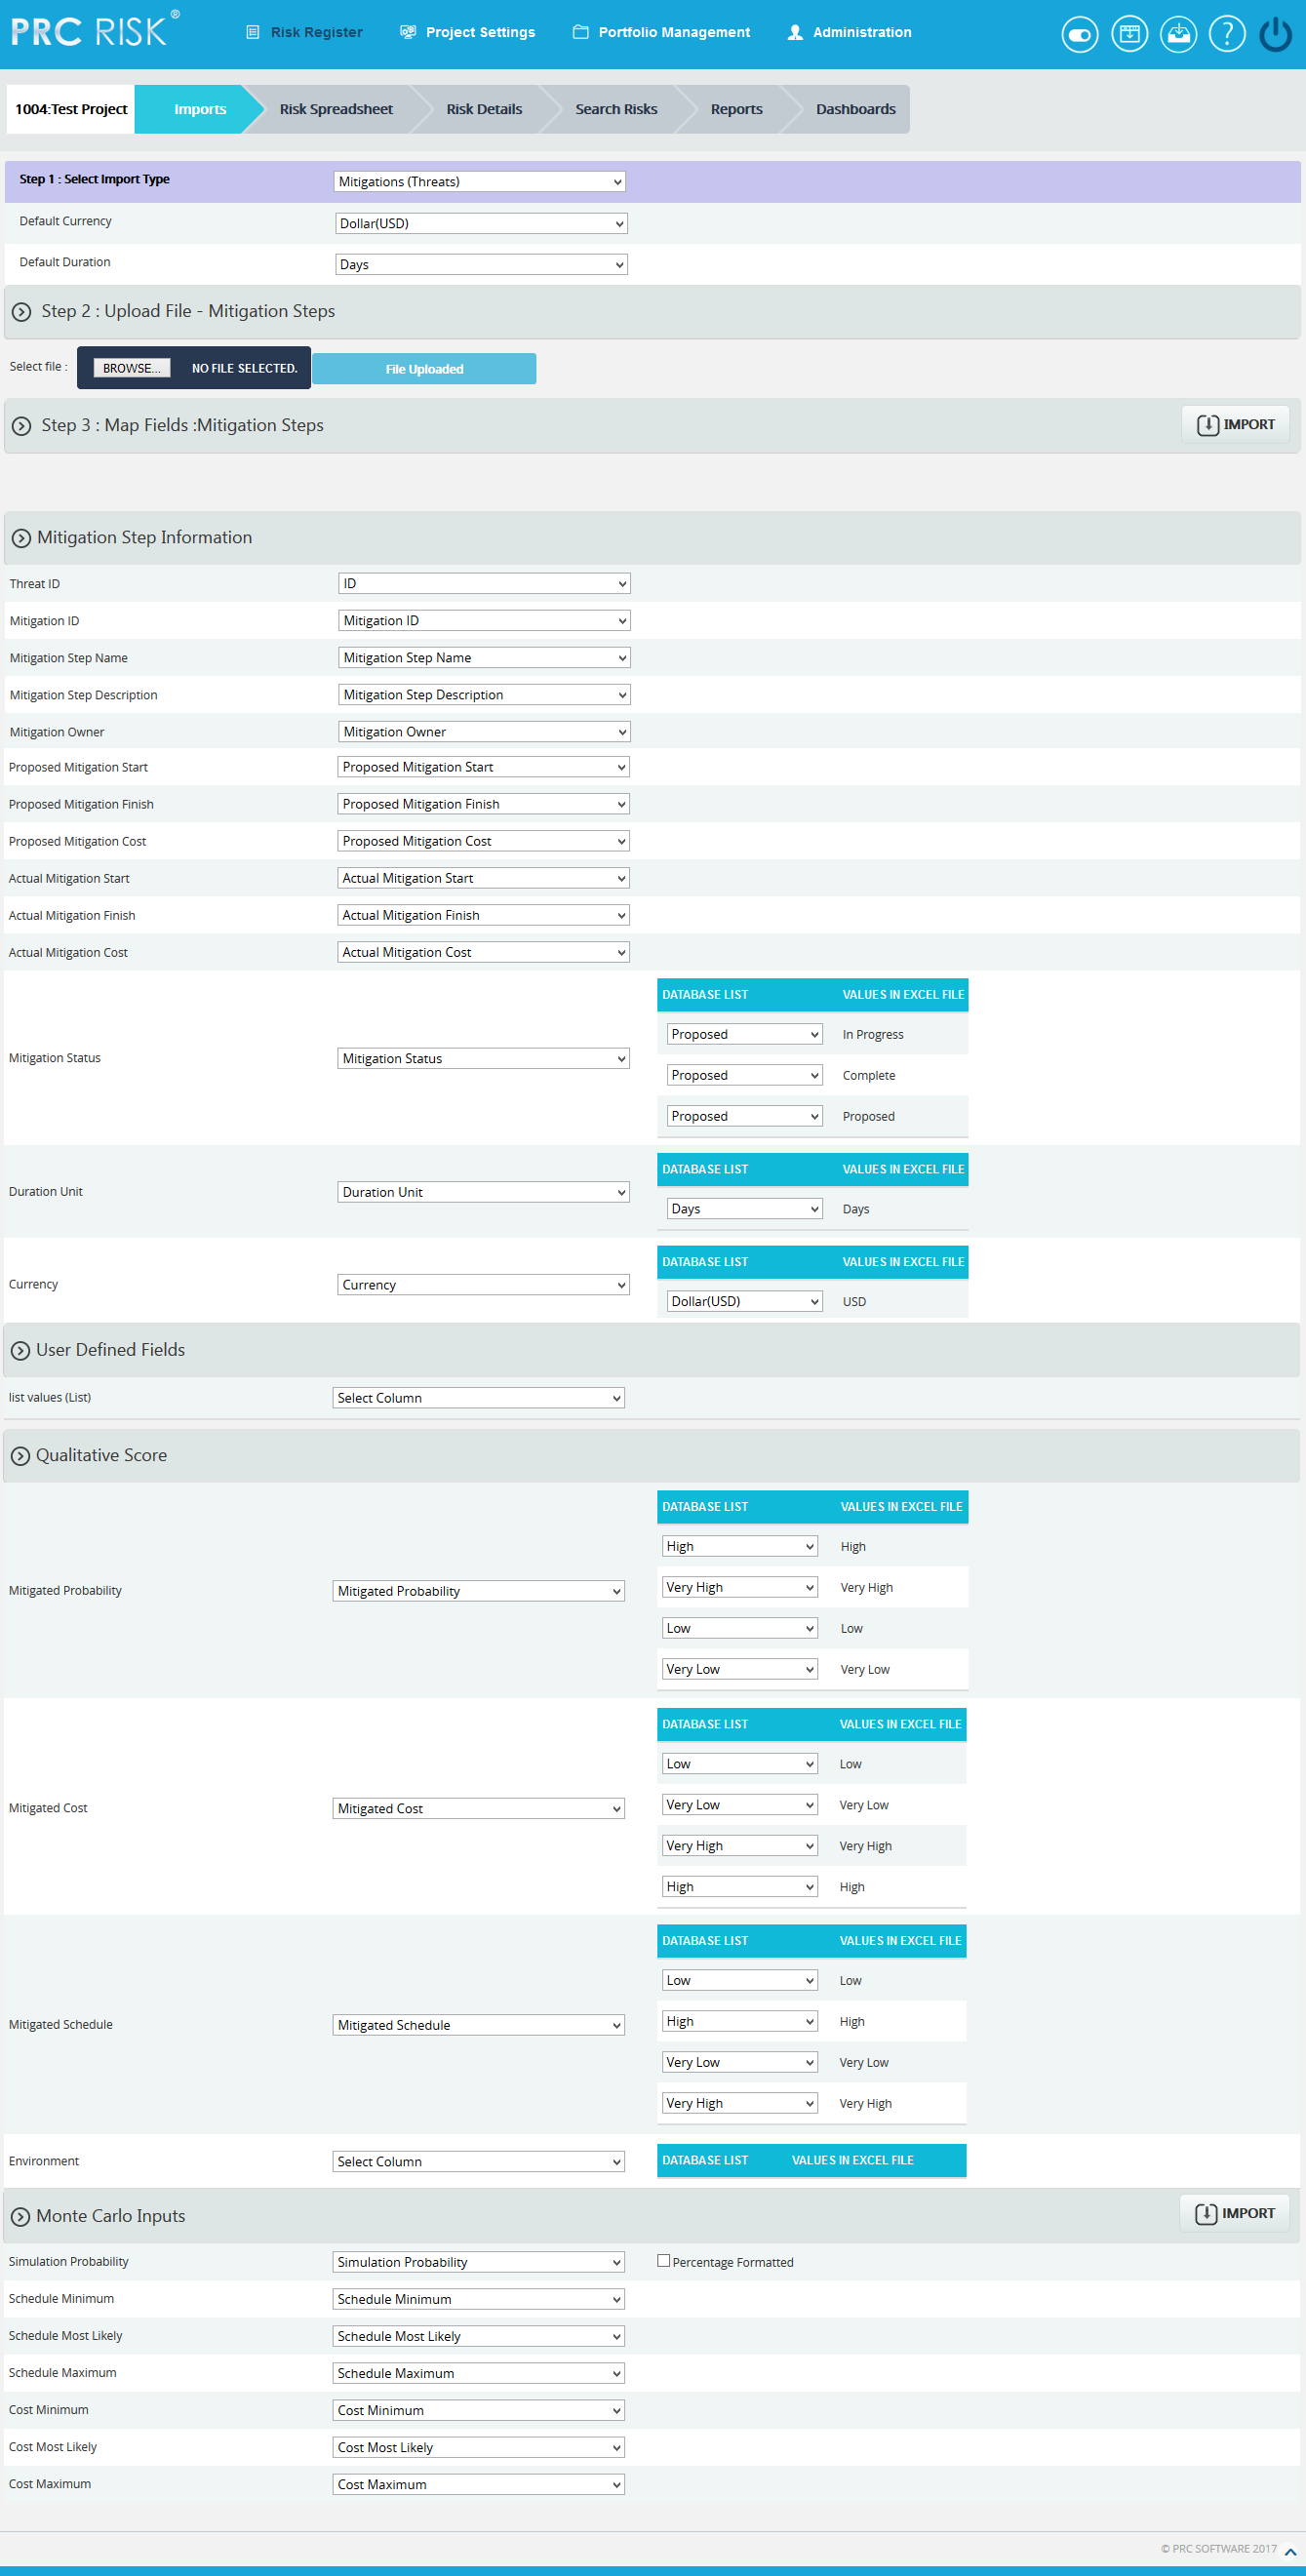
Figure 1
Navigate Page:
To go to the Import Mitigations page, navigate from the Import Risk Register page. The option for navigation from one page to another is located at the top of the page and is shown in Figure 1.
Steps:
- Risk Register —> Imports
- Select Mitigations from Select Import Type dropdown (Figure 1) to navigate to the Import Mitigation page.
To navigate to the Import Risk Register page or the Import Opportunity Register page from the Import Mitigation page, check the steps below.
Steps:
Select Opportunities from Select Import Type dropdown (Figure 1) to navigate to the Import Opportunity Register page.
Or
Select Threats from Select Import Type dropdown (Figure 1) to navigate to the Import Risk Register page.
Upload File:
Files of type csv, xls which contain mitigation details can be uploaded. The Clear All button (Figure 3) is used to clear uploaded files. The Clear link (Figure 3) also clears the uploaded file. After the file is uploaded it must be mapped with the correct fields before saving.
Steps:
-
-
Risk Register —> Imports
-
Select Mitigations (Threats)/Mitigations (Opportunities) from the dropdown. (Figure 1)
-
Click the Browse button. Select the required file. (Figure 2)
-
Click the Upload File button to finish. (Figure 3)
-

Figure 2
![]()
Figure 3
Select Sheet:
If the uploaded file contains more than one sheet, the user must select the sheet required.
Steps:
- Risk Register —> Imports
- Select the sheet required and click the Change Sheet button to change the sheet. (Figure 1)
Map Data:
The Risk ID field and Mitigation Step Name must be mapped, otherwise the file will not be imported. The mapped Risk ID should correspond to the Threat/Opportunity (depends on the risk type selected). If the Threat/Opportunity does not match the Risk ID, the file cannot be imported and a validation message will be shown indicating that the Risk ID does not match.
Proposed Mitigation Start, Proposed Mitigation Finish, Actual Mitigation Start and Actual Mitigation Finish each have a date format displayed next to its field. (Figure 4) The date format is set during user creation in the Administration —> Manage Users page under the Date Format section. Imported mitigation fields should have the same date format shown in the page. All other formats will generate an invalid date format message.
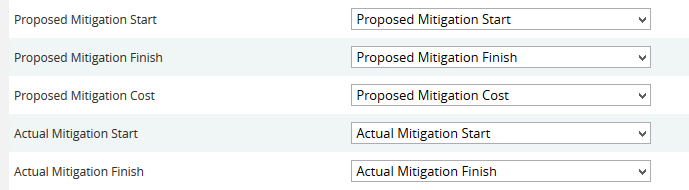
Figure 4
There are four possible values for Field Mitigation Status. The user must map the value as Proposed, In-progress, Rejected or Complete in order to import the Mitigation Status field. In Figure 5 we have mapped the mitigation status value as In Progress.

Figure 5
For the Qualitative score fields: Probability, Cost, schedule and additional impacts, (Figure 6) the user should map the corresponding fields if the score must also be imported.
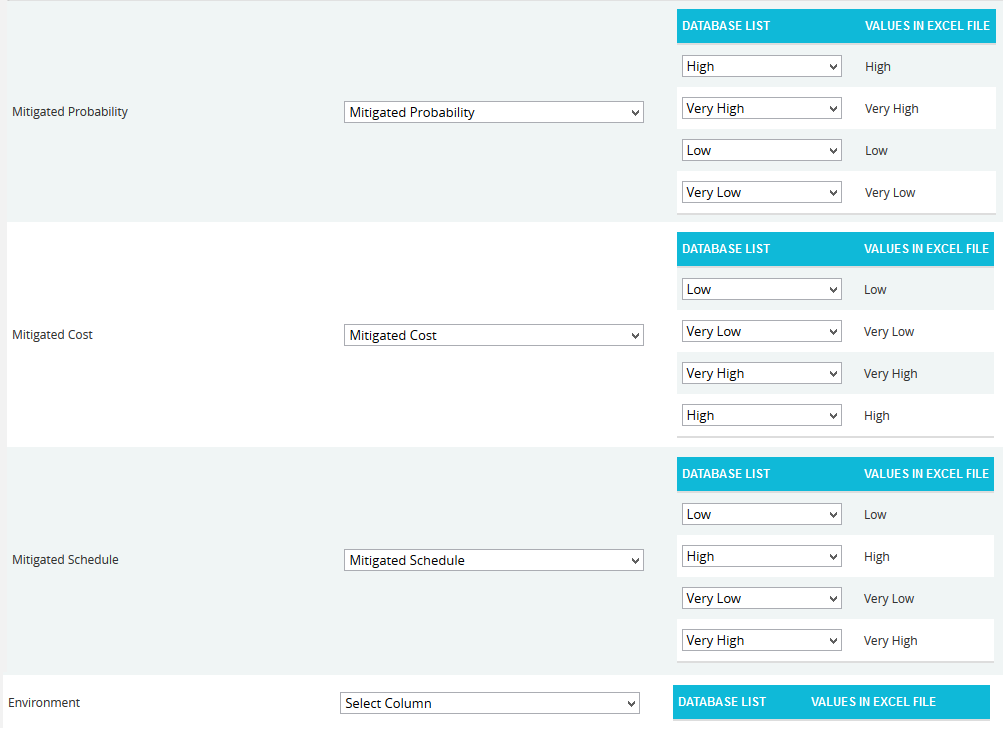
Figure 6
In the Simulation Probability field, the box for Percentage Formatted (Figure 7) should be checked if the simulation probability data is represented in percentage form.
![]()
Figure 7
Import Mitigation Details:
Once the required fields have been mapped, save the data to make it available in other pages.
Steps:
- Risk Register —> Imports
- Select the Mitigations (Threats)/Mitigations (Opportunities) from the dropdown. (Figure 1)
- Click the Import Mitigation Data button to save the imported file. (Figure 1)
If the Imported file contains a duplicated mitigation, a validation message (Figure 8) will be generated. Click the OK button (Figure 8) to confirm, and on confirmation the mapped data is overwritten. If you do not want to overwrite the data, click the Cancel button. (Figure 8)

Figure 8