The Search Risks (Opportunities) page allows the user to search the company database for past and existing opportunities. The database consists of data from open and closed projects across multiple business units. This provides the ability to analyze all risks to see if they apply to the current project. If the user finds an opportunity that fits the requirements of another project, the option is available to include the mitigation plan/step(s) and edit the risk data before copying it over to the selected project. The Qualitative Score Fields and User Defined Fields will not be copied over since every project is different when it comes to these fields. If the project is not selected the access privileges will correspond to the selected opportunity´s project. Only opportunities of projects whose Classified field is set to NO will be displayed in the search risks section.
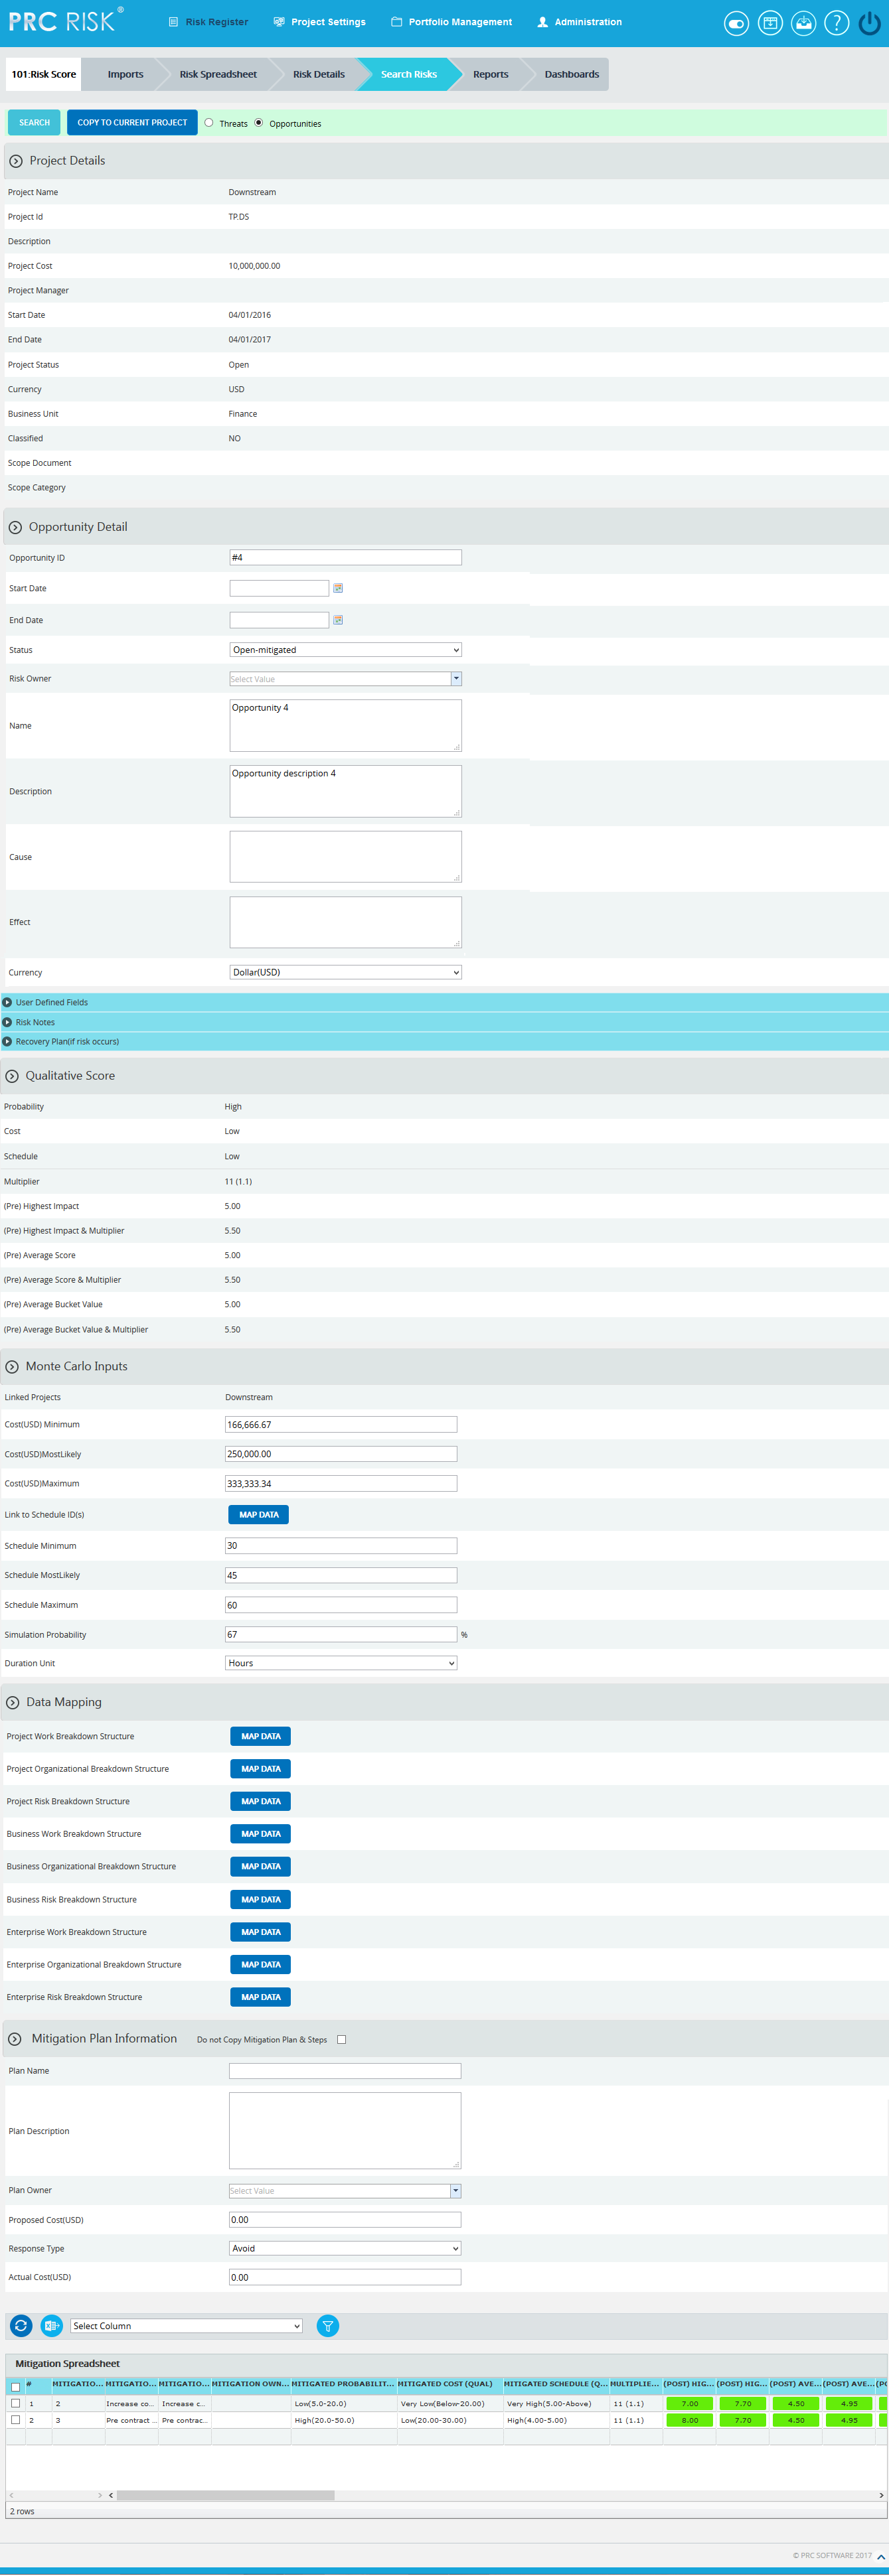
Figure 1
Navigate Page:
There is an option placed at the top of the page to navigate from one page to another. To navigate to Search Risks (Opportunities), click the Opportunities radio button shown in Figure 1.
To navigate to Lesson Learned (Threat), click the Threats radio button shown in Figure 1.
Search:
The Search function allows the user to search for an opportunity based on a keyword. This method is faster when you are working with large amounts of data. Opportunity details can be searched even if project is not selected. If the project is not selected the fields correspond to the selected opportunity´s project.
Steps:
-
Risk Register —> Search Risks —> Opportunities
-
Click the Search button. (Figure 1)
-
Enter the search keyword (which can be the ID or name) and click the Search button and select the required opportunity. (Figure 2)
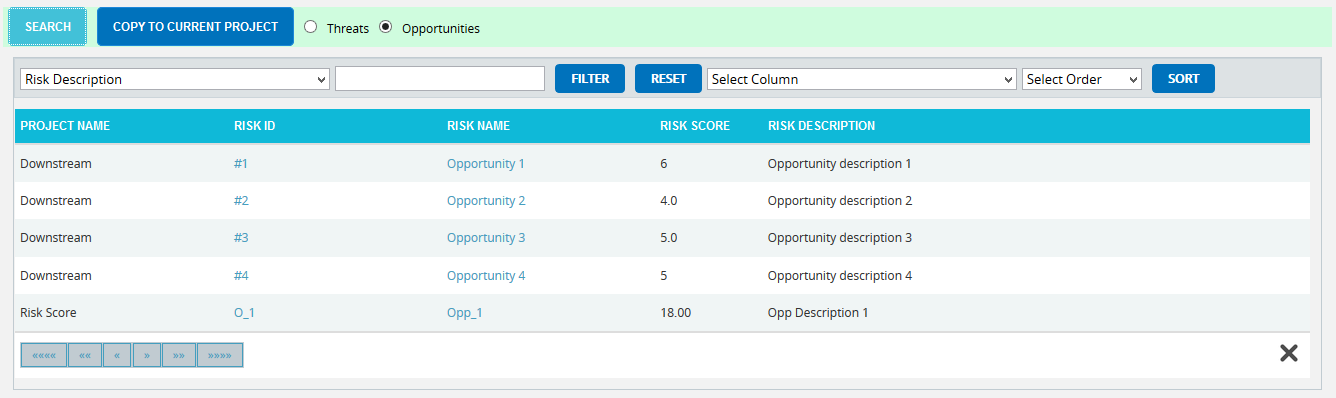
Figure 2
To Filter the search area contents
Steps:
- Select the required column. (Figure 2)
- Enter the value based on which filtering is to be done. (Figure 2)
- Click the FILTER button. (Figure 2)
To Sort the data
- Select the required column. (Figure 2)
- Select the order(Ascending/Descending) in which sorting is to be done. (Figure 2)
- Click the Sort button to SORT the data in the search area. (Figure 2)
- To reset the details for filter and sort fields, click the RESET button. (Figure 2)
User Defined Fields Section:
All user defined or custom fields will be shown in this section. There is no limit to the number of user defined fields. In Search Risks (Opportunities) even though user defined fields are visible they cannot be copied to the current project.
User Defined Fields are added as follows:
Project settings —> Custom Fields
Risk Notes Section:
The Risk Notes added from Risk Details (Opportunities) or Spreadsheet View (Opportunities) are visible in this section. The user cannot add or edit Risk Notes from Search Risks (Opportunities).
Recovery Plan Section:
The Recovery Plan section is designed to document what is to be done if a mitigation is not successful and the risk event does occur. It also documents the steps the team should be prepared to take if the risk becomes a reality. If the Recovery Plan has been added to the selected opportunity it will be visible in this section. The user cannot add or edit the recovery plan from Search Risks (Opportunities).
Closure Section:
The Closure Section is used for documenting the actual impact of the risk event on the project.
Qualitative Score Section:
The Qualitative Score fields include Probability, Cost, Schedule and Additional Impacts, if any. (Figure 1) These fields are used to set the pre-mitigated score. If Probability and impacts have a value of either Undefined or No Risk, the risk score will be zero. Even though the risk score of a selected opportunity is visible it cannot be copied to the selected project.
Data Mapping Section:
The Data Mapping section shows to which Breakdown Structure opportunity is mapped to, and at what level (Project, Business Unit, or Enterprise). It is not required to map data, but it will be useful when the time comes to report at the portfolio level.
Project Organizational Breakdown Structure, Project Work Breakdown Structure and Project Risk Breakdown Structure details are added from the page
Project Settings —>Project Breakdown Structure
Business Organizational Breakdown Structure, Business Work Breakdown Structure, Business Risk Breakdown Structure, Enterprise Organizational Breakdown Structure, Enterprise Risk Breakdown Structure, and Enterprise Work Breakdown Structure are added from the page:
Portfolio Management —> Manage Breakdown Structure
Enterprise Risk details are added from the page:
Portfolio Management —> Reports —> Enterprise Risk List
To Map data:
Steps:
- Click the MAP DATA link to map data for the corresponding field. (Figure 1)
- Select the required data from the select box. (Figure 3)
- Click the SELECT WBS button (if Work Breakdown Structure), SELECT OBS button (if Organizational Breakdown Structure), SELECT RBS button (if Risk Breakdown Structure) to finish. (Figure 3)
The steps described above applies to all Organizational Breakdown Structure, Work Breakdown Structure and Risk Breakdown Structure fields.
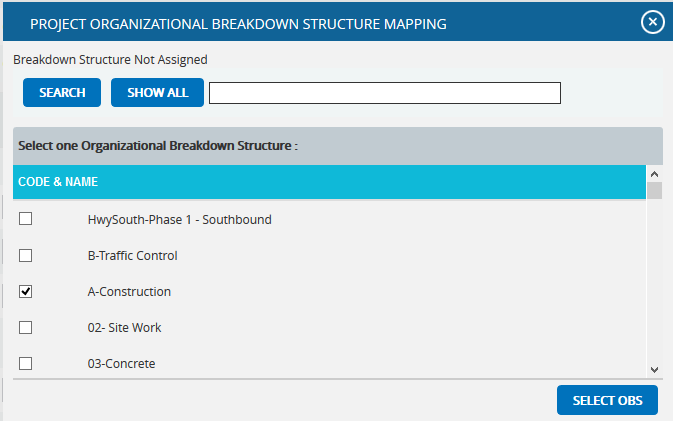
Figure 3
To search for a particular value (Figure 3), enter the value and click the SEARCH button. To list all the values available, click the SHOW ALL button.
Mitigation Details:
Users can track their Mitigation Plan or individual mitigation steps. The mitigation plan is a compilation of the individual steps below it. The mitigation plan cost is rolled up from the cost of each mitigation step. Accountability is created when the step owner and planned dates are tracked. Reports can be generated to identify all mitigation steps that are currently behind the schedule.
The qualitative and quantitative scoring fields (Probability, Cost, Schedule, etc.) in the mitigation steps represent the residual risk that remains after a mitigation step is completed. The goal is to mitigate a risk until it is gone, however often this is not possible. It is important to document any residual risk that cannot be removed for the benefit of the project team and the accuracy of Monte Carlo simulations. Any graph that highlights a post-mitigated score will focus on the residual risk after all mitigation steps have been completed. The status of a mitigation step and the actual dates should be updated as the steps are started and finished. There is an option not to copy both mitigation plan and steps or mitigation steps alone to the selected project.
If you do not want to copy the mitigation plan and steps to the selected project, click the Do not Copy Mitigation Plan & Steps checkbox shown in Figure 4. If you do not want to copy just the mitigation steps, click the checkbox under the Do not Copy this Step column in Figure 5.
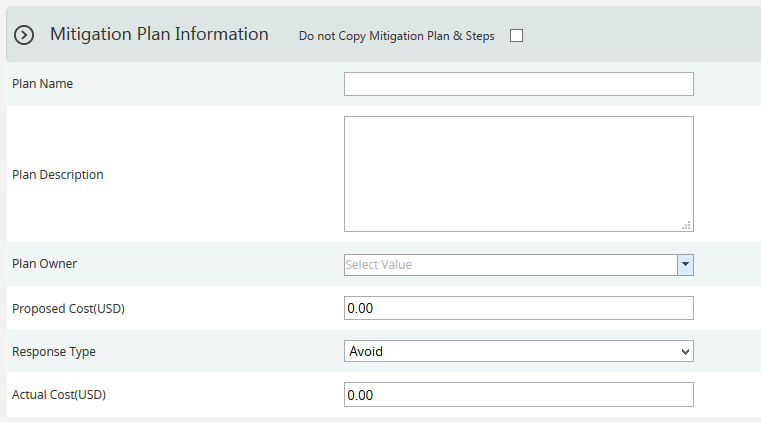
Figure 4
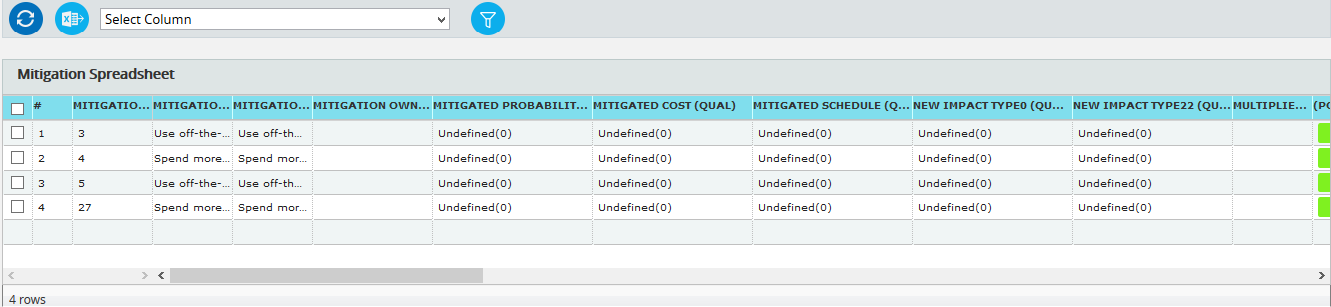
Figure 5
Copy to Current Project:
This functionality is used to copy the selected opportunity to a selected project.
Steps:
- Risk Register —> Search Risks —> Opportunities
- Select the required opportunity
- Click the COPY TO CURRENT PROJECT button to copy the selected threat to the current project. (Figure 1)