User Management section in the PRC Enterprise Risk Register can be viewed only by those users who have either Read/Write or View access. Users with only Read/Write access can create a new user, edit users, add a project for a selected user, delete a user, unassign a project to a user, and change the access privileges of users.
Users designated with View Access may view specific pages, select a user, view user details and view projects assigned. Access to editing functions is not available to these users.
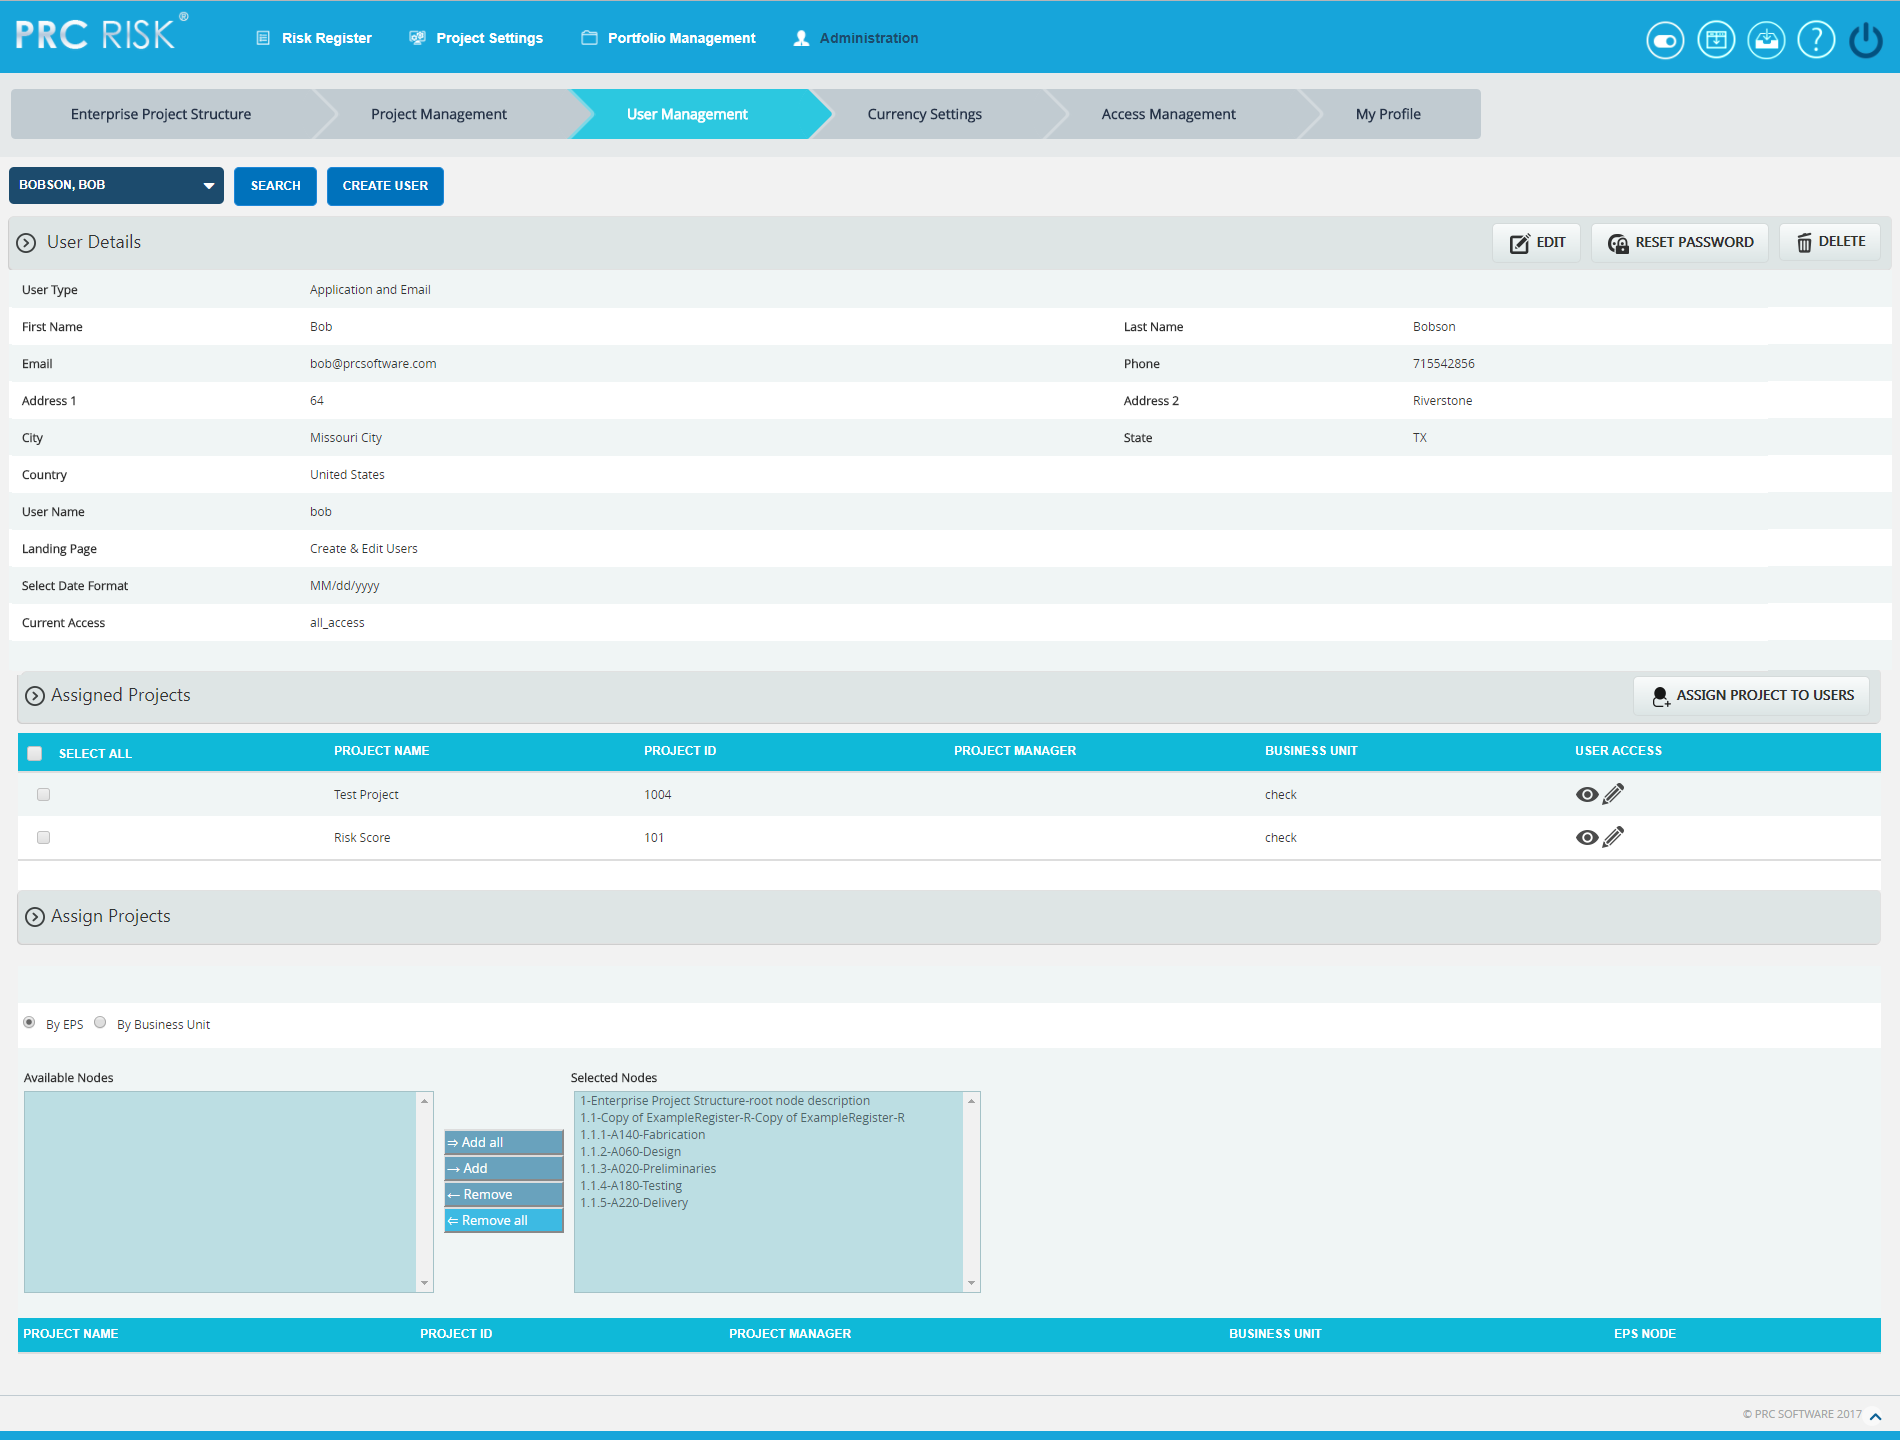
Figure 1
Searching For Users:
Searching for users in the PRC Enterprise Risk Register can be done in two different ways. The Search function allows the user to search based on a keyword. This method is faster when working with large amounts of data. The Select function is commonly used for smaller databases or when the search objective is easy to define.
Using the search function:
Steps:
-
Administration —> User Management
-
Click the SEARCH button. (Figure 1)
-
Enter the name (which can be either first name or last name or both) or user name. Click the SEARCH button and select the required user. (Figure 2)
-
The SHOW ALL button in the search area lists all users available. (Figure 2)
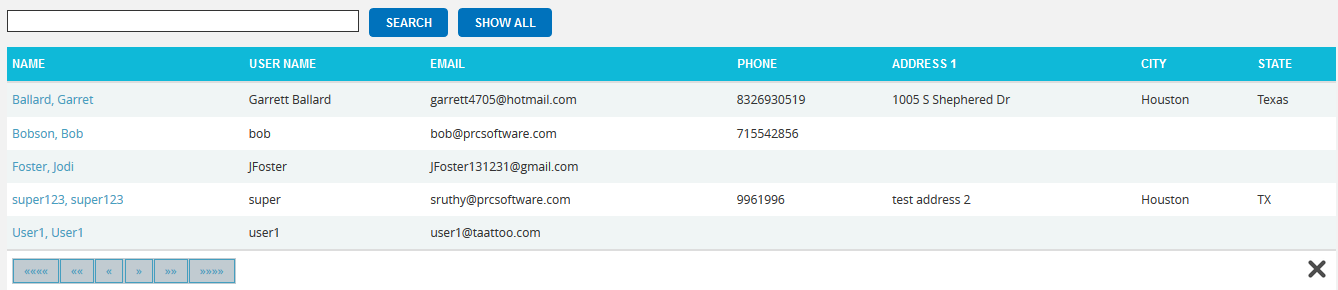
Figure 2
Using the select function (dropdown list):
Steps:
- Administration —> User Management
- Click the SELECT USER dropdown. (Figure 1)
- Select the required user from the list shown.
Creating a new user:
Creating a new user in the PRC Enterprise Risk Register is quick and easy. It is important to enter as much information as possible about the user when the new user is created. The Landing Page sets the first page the user sees upon login.
Steps:
- Administration —> User Management
- Click the CREATE USER button. (Figure 1)
- After entering the user data, click the SAVE button. (Figure 1)
Editing user information:
When editing user details in the PRC Enterprise Risk Register, all the fields are unlocked and user can modify all user details.
Steps:
- Administration —> User Management
- Click the SEARCH button. The available details will be listed.
- Click a record which is to be modified. Then click the EDIT button. (Figure 1)
- After the data is modified, click the SAVE button. (Figure 3)
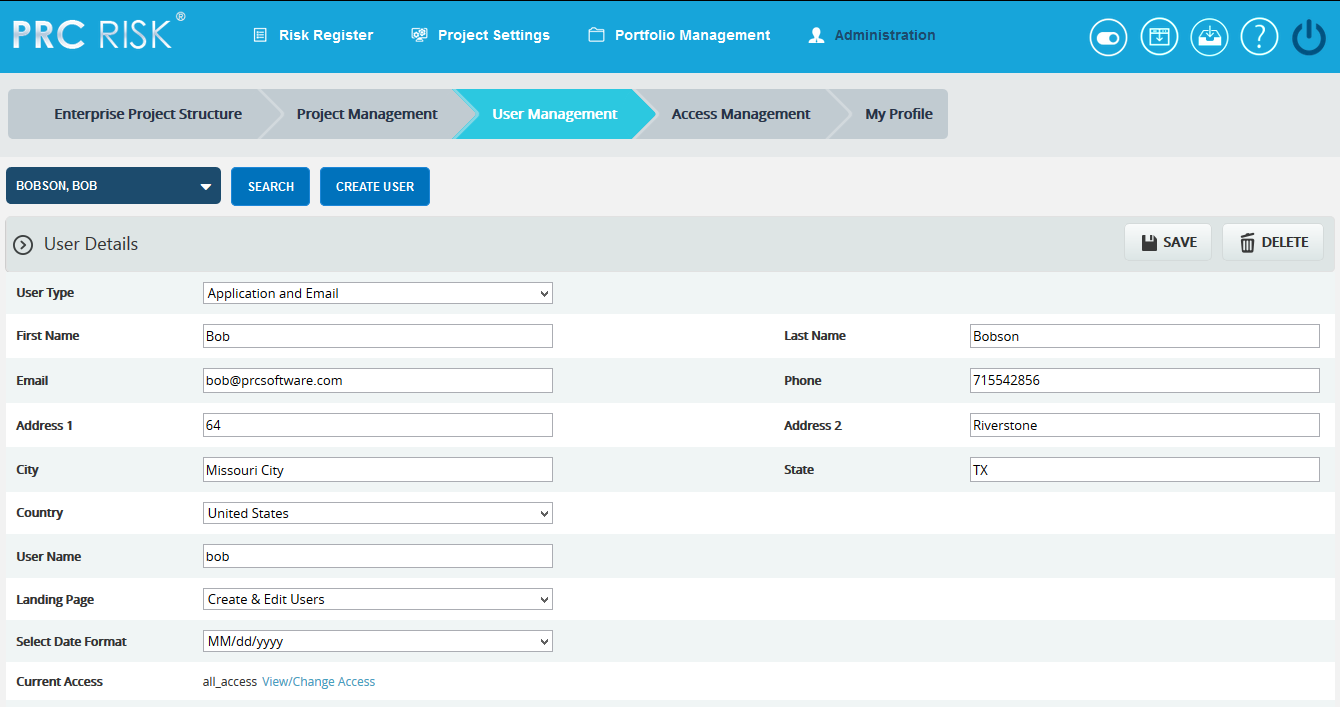
Figure 3
Assign New Project to User:
This functionality helps to assign a project to a selected user. The Project is selected directly and assigned to the user.
Assign Project:
Steps:
- Administration —> User Management
-
Click the ASSIGN PROJECT TO USERS button. (Figure 1)
-
Search and select for the project. (Figure 4)
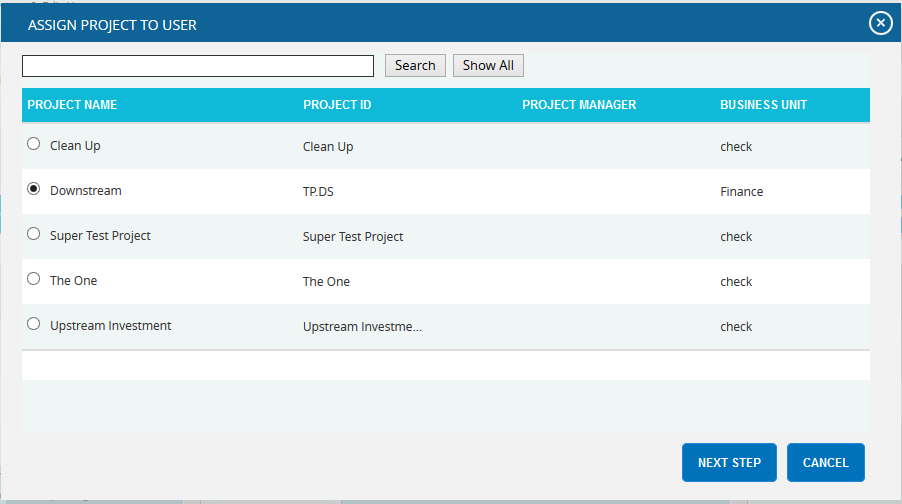
Figure 4 -
To continue, click the NEXT STEP button. (Figure 4) A pop up (Figure 5) appears from which user access can be set.
-
After modifying access, click the FINISH button (Figure 5) to save changes.
The SHOW ALL button (Figure 4) lists all the projects available from which user can select the required project. If the user knows the project they are searching for, they can enter the name and click the SEARCH button. (Figure 4)
The CANCEL button cancels the projects selected for the user. (Figure 4)
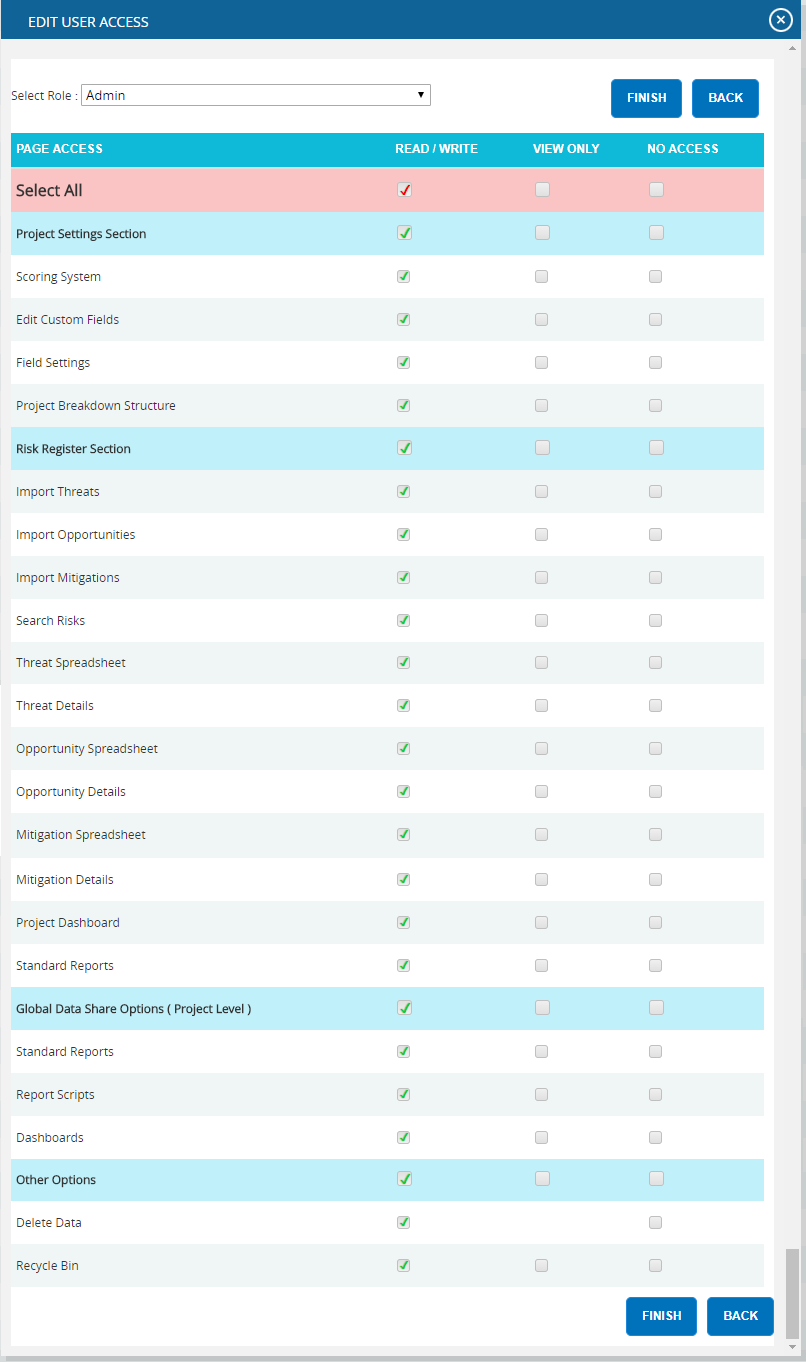
Figure 5
Add User to Projects (For EPS & Business Unit) :
This functionality is used to add a user to the project under EPS node/Business unit. This section is visible only after an EPS node or Business Unit is selected.
If the user is already selected, control goes directly to step 3.
Steps:
- Administration —> User Management
-
Click the ADD USER TO PROJECT button. (Figure 1)
-
Select the required user. (Figure 6)
-
A pop up (Figure 5) appears from which the user accesses can be set.
-
After modifying the accesses, click the FINISH button to save the changes. (Figure 5)
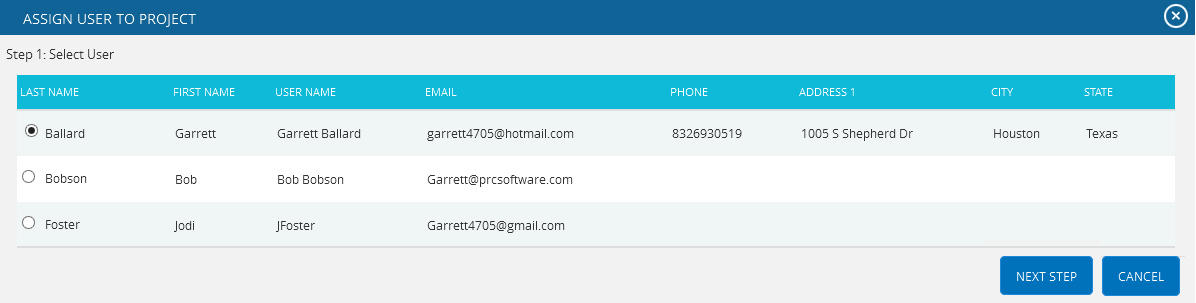
Figure 6
Assign project by selecting EPS node:
This section is used to assign users to projects which have already been added to the Enterprise Project Breakdown Structure node. The functionality consists of two lists, Available Nodes and Selected Nodes. Available Nodes (Figure 7) contains all the nodes added to the Enterprise Project Structure. Selected Nodes (Figure 7) displays the nodes that have previously been selected. A node can be added to the Selected Nodes list using the Add button. All nodes under the Available Nodes list can be moved to the Selected Nodes list using the Add All button.
A single node from the Selected Nodes list can be moved back to the Available Nodes list using the Remove button. If the Selected Nodes list contains more than one node and the user needs to move them back to the Available Nodes list, they can use Remove All button.
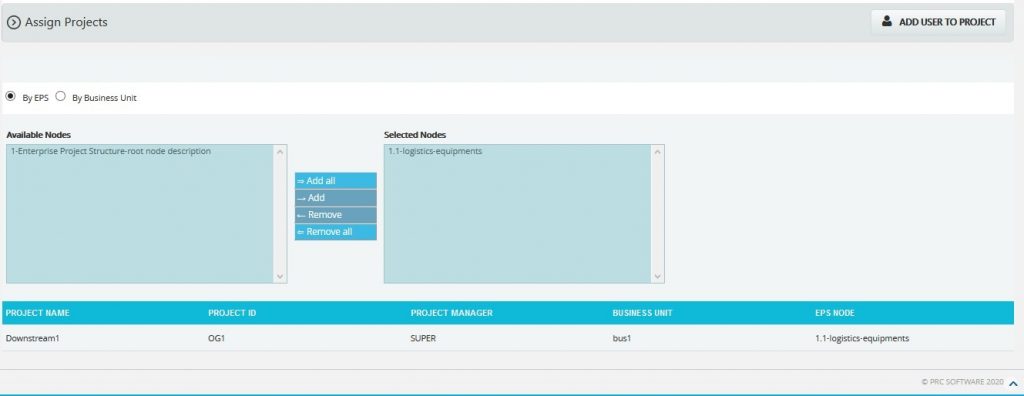
Figure 7
Steps:
- Administration —> User Management
- Click the By EPS radio button. (Figure 7)
- Add the required nodes to Selected Nodes list by using either the Add button or the Add All button. (Figure 7) The projects under Selected Nodes will be displayed.
- Click the ADD USER TO PROJECT button. (Figure 1) Check the steps described under Assign Projects section.
Assign project by selecting Business Unit:
This functionality helps to assign Projects which have already been added to the Business Unit to the selected user. The functionality consists of two lists, one called Available Nodes (Figure 8) which contains all the business units available and another called Selected Nodes (Figure 8) which displays the business unit selected. A Business Unit can be added to the Selected Nodes list using the Add button. The entire business unit under the Available Nodes list can be moved to the Selected Nodes list using the Add All button. A single business unit from the Selected Nodes list can be moved back to the Available Nodes list using the Remove button. If the Selected Nodes list contains more than a business unit and the user needs to move them back to the Available Nodes list, they can use the Remove All button.
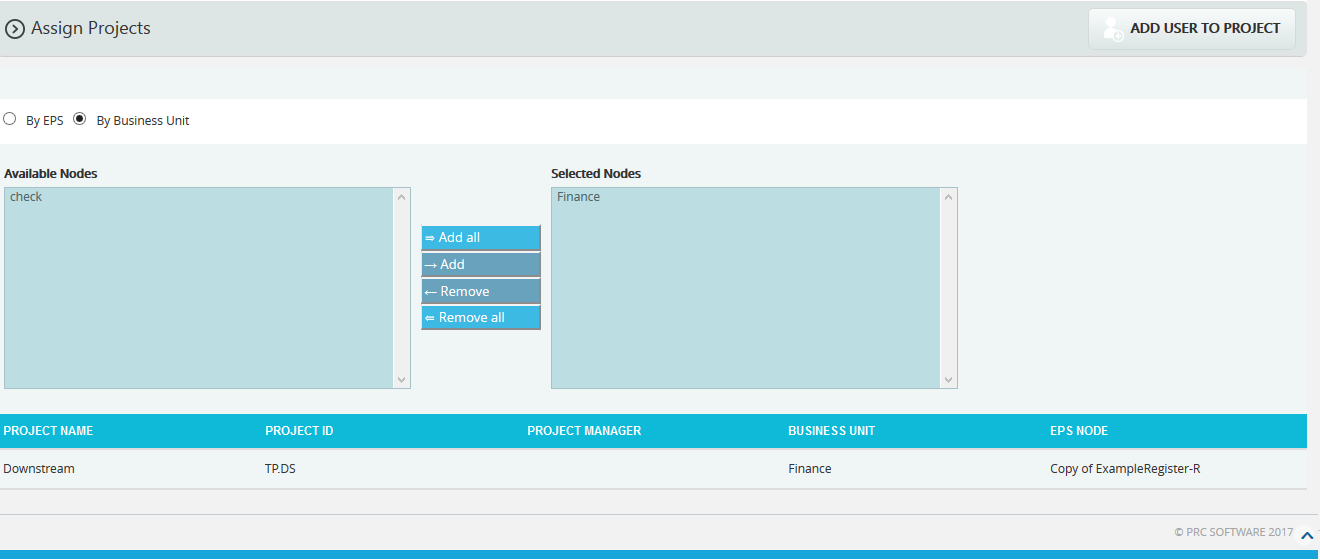
Figure 8
Steps:
- Administration —> User Management
- Click the By Business Unit radio button. (Figure 8)
- Add the required nodes to the Selected Nodes list by using either Add button or Add All button. (Figure 8) The projects assigned to the business unit under the Selected Nodes list will be displayed.
- Click the ADD USER TO PROJECT button. (Figure 1) Check the steps described under Assign Projects section.
Edit User Accesses:
In order to edit multiple projects user accesses, select the projects by checking the checkboxes under the Select project column and click the EDIT USER ACCESS button to do the changes.
Steps:
- Administration —> User Management
- Click the Select User dropdown. (Figure 1)
- Select the required user from the list shown.
- Select the projects, by checking the checkboxes under the Select Project column for which the user accesses are to be changed. (Figure 9)
- Click the EDIT USER ACCESS button to do the changes. (Figure 9)
- A pop up appears. (Figure 10) After modifying access, click the SAVE button to save the changes or click CANCEL.

Figure 9
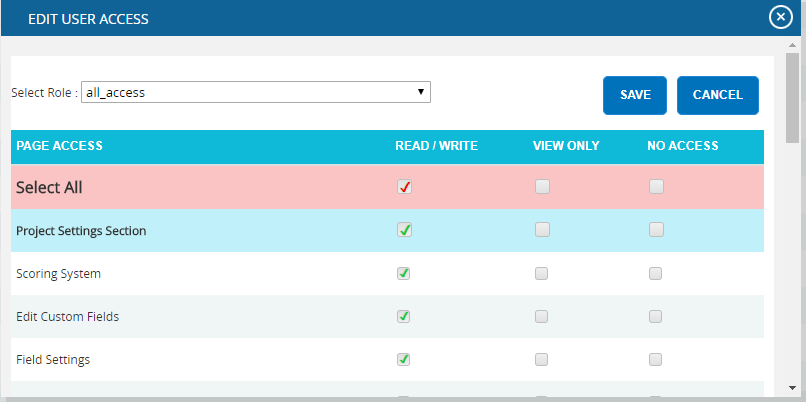
Figure 10
View/ Edit:
In order to view or edit individual project’s user access, click View/Edit link (Figure 9) under the Assigned Projects section.
Steps:
- Administration —> User Management
- Click the Select User dropdown. (Figure 1)
- Select the required user from the list shown.
- Click the View/Edit to view or edit individual project’s user access. (Figure 9)
- A pop up appears. (Figure 10) After modifying access, click the SAVE button to save the changes or click CANCEL.
Detach Project:
In order to remove a project assigned to a user, select the projects by checking the checkboxes under the Select project column and click DETACH PROJECTS button. (Figure 9)
Steps:
- Administration —> User Management
- Click the Select User dropdown. (Figure 1)
- Select the required user from the list shown.
- Select the projects, by checking the checkboxes under the Select Project column. (Figure 9)
- Click the DETACH PROJECTS button. (Figure 9)
- A pop up appears. (Figure 11) Click OK to detach or click Cancel.
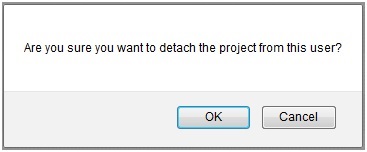
Figure 11
Deleting Users:
The deleted user will be removed from the system. Once the user is deleted, the details are completely removed. The action cannot be undone. In order to delete a user, the user logged in should have Read/Write access for delete function.
Steps:
- Administration —> User Management
- Select the required user.
- Click the DELETE button. (Figure 1) The user receives a confirmation message. Click OK to remove the user from the system or click Cancel.
Reset Password:
This functionality is used to change the password of the selected user.
Steps:
-
Administration —> User Management
-
Click the RESET PASSWORD button. (Figure 1) A pop up appears. (Figure 12)
-
Enter New Password and Confirm New Password and click the CHANGE PASSWORD button to finish. (Figure 12)
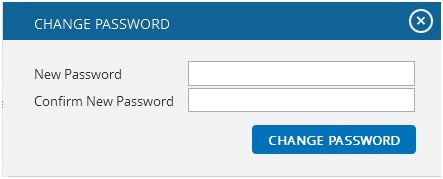
Figure 12
View/Change Access:
This functionality helps to view/change the user access to all the pages by assigning a particular role to the user.
Steps:
-
Administration —> User Management
- Select the required user.
- Click the EDIT button. (Figure 1)
- Click View/Change Access link from. (Figure 3) A pop up appears. (Figure 13)
- Select a role from the Select Role dropdown list and click ASSIGN ROLE button. (Figure 13)
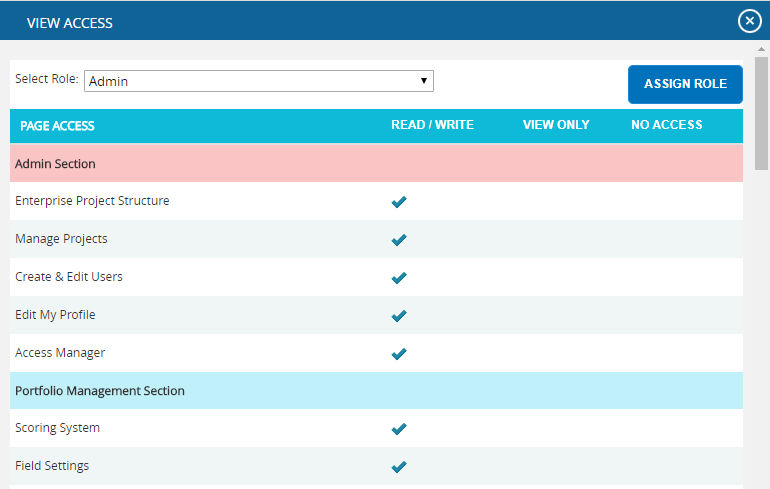
Figure 13
User Type:
This functionality is used to create user based on the User Types such as Application and Email, Application only and Email only.
Application and Email: Allows the user to access the application and also allows sending and receiving emails.
Application only: Allows the user to access only the application.
Email only: Allows the user to only receive email to access the application data.
Steps:
- Administration —> User Management
- Click the EDIT button. (Figure 1)
- Select the licensing option from the User Type dropdown. (Figure 14)
- Click the SAVE button. (Figure 14)
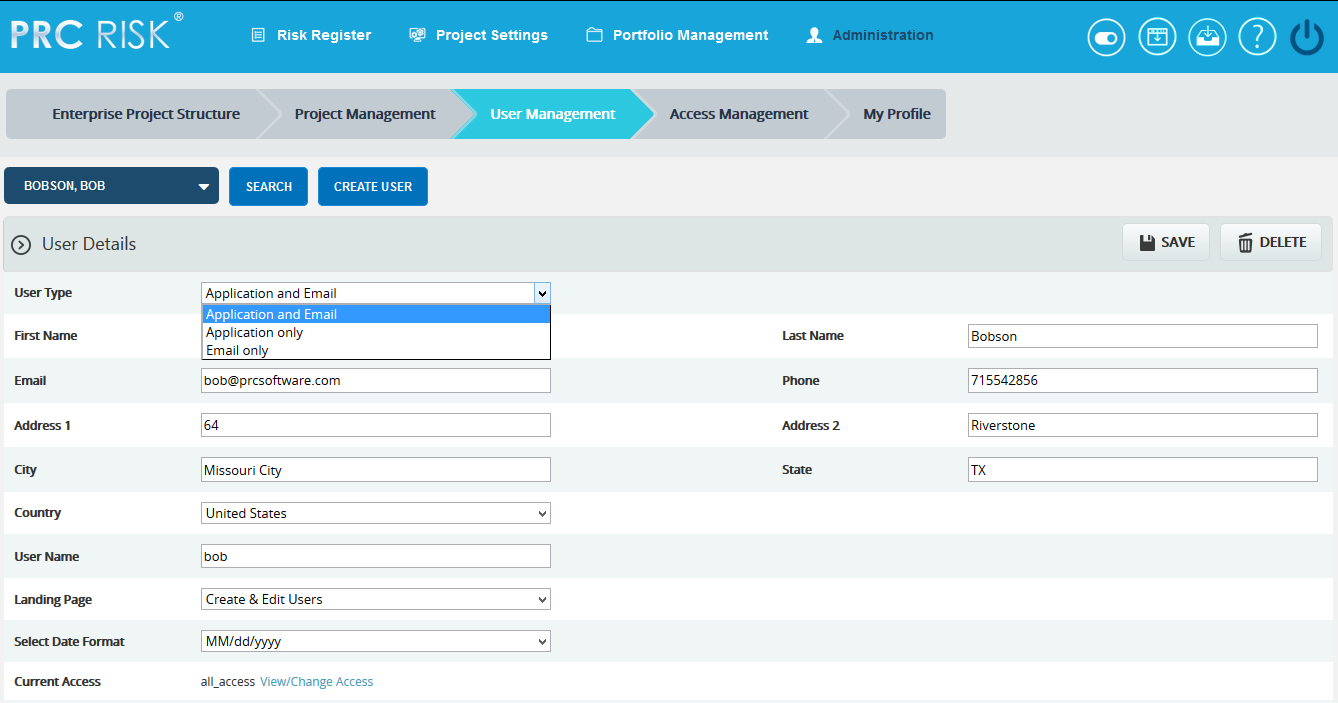
Figure 14